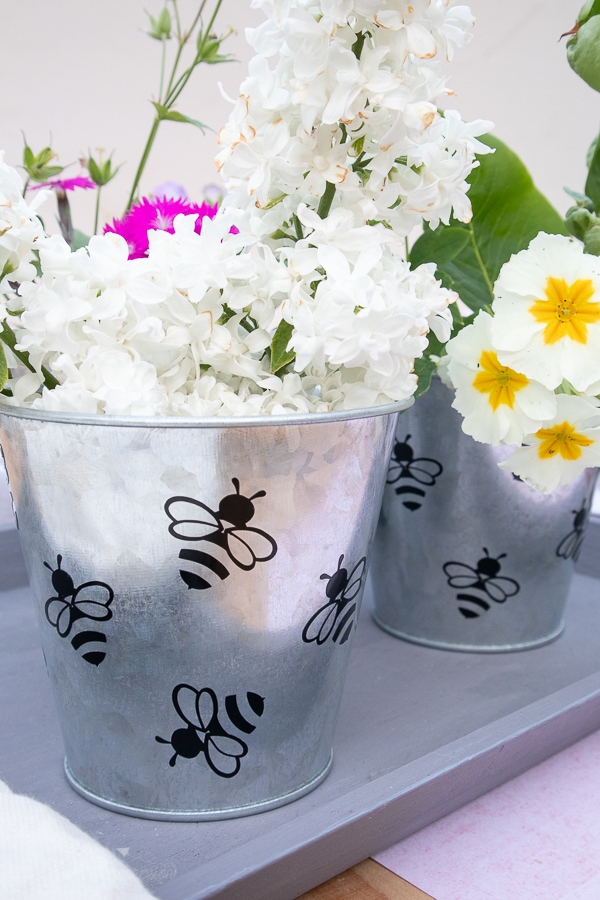
These adorable custom flower buckets are perfect and easy to make at home using a cutting machine and some small galvanized containers. We even included a free SVG to make this project even easier!

I love using my Cricut cutting machine to make beautiful and unique seasonal home decor. It is so easy to decorate for the different seasons with just a change of a vinyl decal. Spring and summer are all about bees and flowers so this fun craft idea is perfect! Along with my Q-Tip Flower Pots, this is one of my favorite flower crafting projects.
I love searching the Target Dollar Spot (I guess they call it Bullseye’s Playground now) for inexpensive seasonal items that I can make my own. I spotted some adorable galvanized flower buckets at the spot one day that had some cute sayings on them. I didn’t really like what was already printed but it did give me some ideas on how I could make them myself at home with my cutting machine.
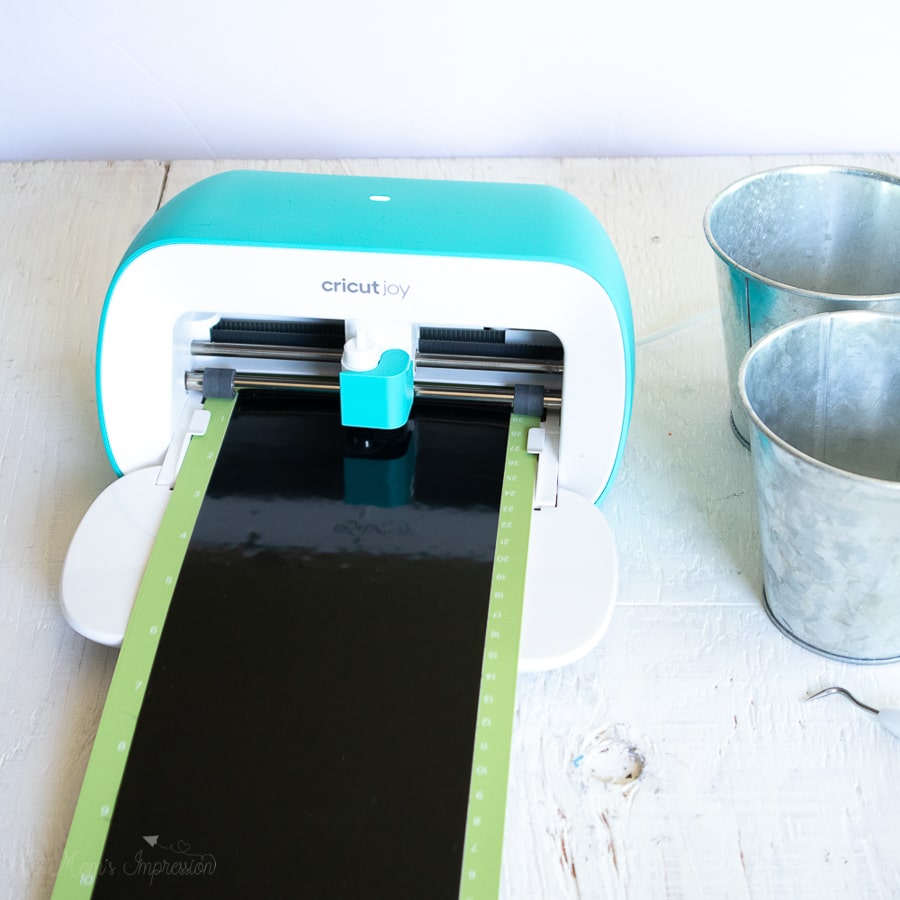
This instructions are for using a Cricut cutting machine, this project specifically used the new Cricut Joy, but you can use any cutting machine you already have.
Customized Flower Bucket Tutorial
Materials Needed:
- Bee SVG File
- Cricut Joy with Fine Point Blade
- Cricut Permanent Glossy Vinyl, black
- Cricut Joy Standard Grip Mat
- Cricut Transfer Tape
- set of 3 Galvanized Buckets, 4” high
- Scissors
- Weeder tool
Instructions:
- Gather supplies.
Preparing the Images:
- Open your Cricut Design Space.
- Open up a blank canvas by clicking on the “+” sign to start a new project.
- Click on the “Upload” button from the toolbar and browse your downloaded files to insert the SVG file.
- You should see the cut image on the canvas. Click on the “Ungroup” button.
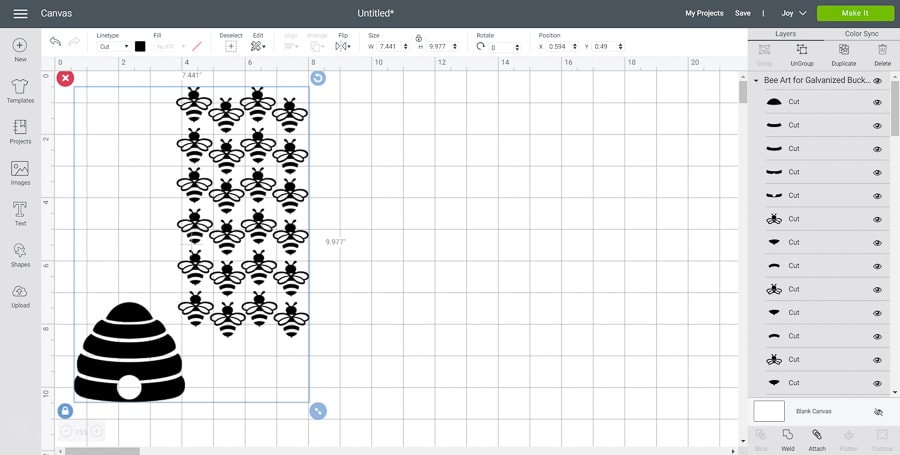
- Highlight the beehive image and click on the “Attach” button to secure all parts of the image together for cutting.
- Next, highlight the bees and click on the “Attach” button to secure all parts of the bee images together for cutting.
- Keep the size the same or adjust to fit your buckets if needed. To adjust the size, highlight the image and click on the size box in the top toolbar. Change the measurement to suit your galvanized buckets size accordingly.
Cutting the Permanent Vinyl:
- Select “Make It” in the upper right corner to proceed with cutting.
- Choose “With Mat” to cut Permanent Vinyl with Cricut Joy.
- Choose the Premium Vinyl, Permanent from the list of options in the drop down menu.
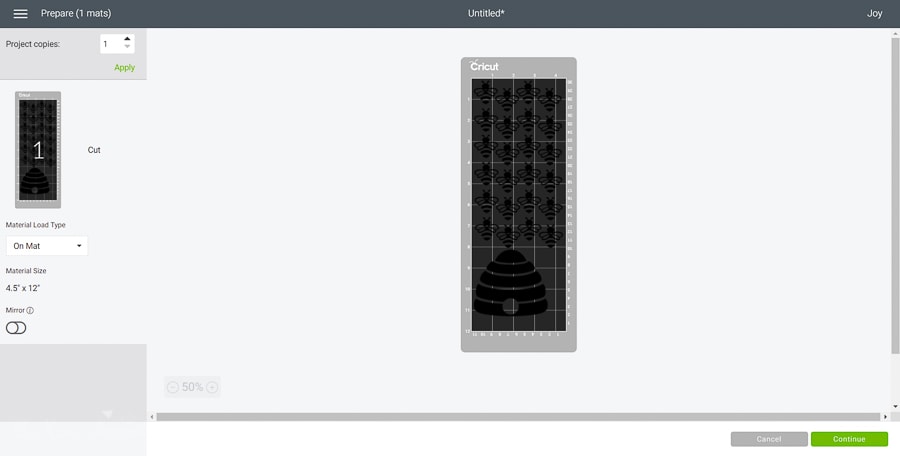
- Cut the width of the Premium Vinyl to fit on to the Cricut Joy standard grip mat and then place the Permanent Vinyl on the mat.
- Following the instructions prompted on the screen, cut out the vinyl.
How to Assemble the Buckets
- Cut around the beehive image with a pair of scissors.
- Peel away the excess vinyl around the cut images and discard with the weeding tool.

- Cut a piece of transfer tape a bit larger than the size of the beehive.
- Peel away the transfer tape backing and place the transfer tape over the top of the cut image. Gently rub the vinyl to help it stick to the transfer tape. I like using the Cricut scraping tool for this step put you can use a credit card too.
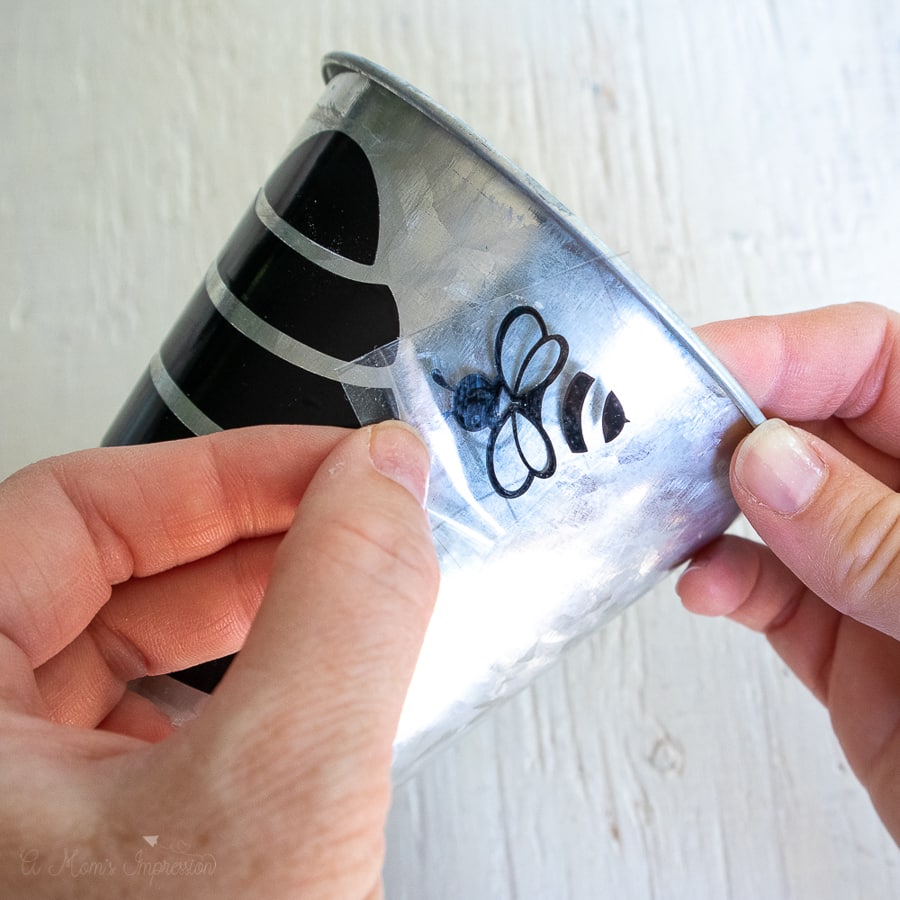
- Peel away the vinyl backing, leaving just the image adhered to the transfer tape.
- Position the beehive with the transfer tape onto one of the buckets and press in place.
- Press the image down with your fingers or with the Cricut scraping tool to help it to stick to the bucket.
- Slowly remove the transfer tape leaving the vinyl image on the bucket.
- Repeat with the individual bees and place them randomly all over the buckets in different directions.
- Fill the buckets with your favorite flowers or other accessories and enjoy. If you are adding water, be sure to line the decorative buckets with a waterproof container to avoid leaks.

More Fun Cricut Tutorials
Cricut Custom Sequin Pillows Tutorial
Cricut Infusible Ink Coasters with Mountain Quotes
Teresa says
I want to make this it looks so nice. How do I download the file as an svg? I am using my iPad and it just opens the picture and doesn’t allow me to download? Help please n thank you