This is a sponsored post written by me on behalf of Cricut. All opinions are 100% mine.
If you know me, you know how hard I fell for my Cricut Explore Air 2 when it arrived at my home at the end of last year. I have always been crafty, but my Cricut cutting machine brought my craftiness to a whole new level. Since then I have made and personalized shirts, coasters, stickers, masks, school supplies, and pillows. I have made interesting crafts like cacti, sequin pillows, flower pots and even a stop-motion race car track for my son. Needless to say, my Cricut Exp lore Air 2 has gotten a lot of use over the past 8 months. 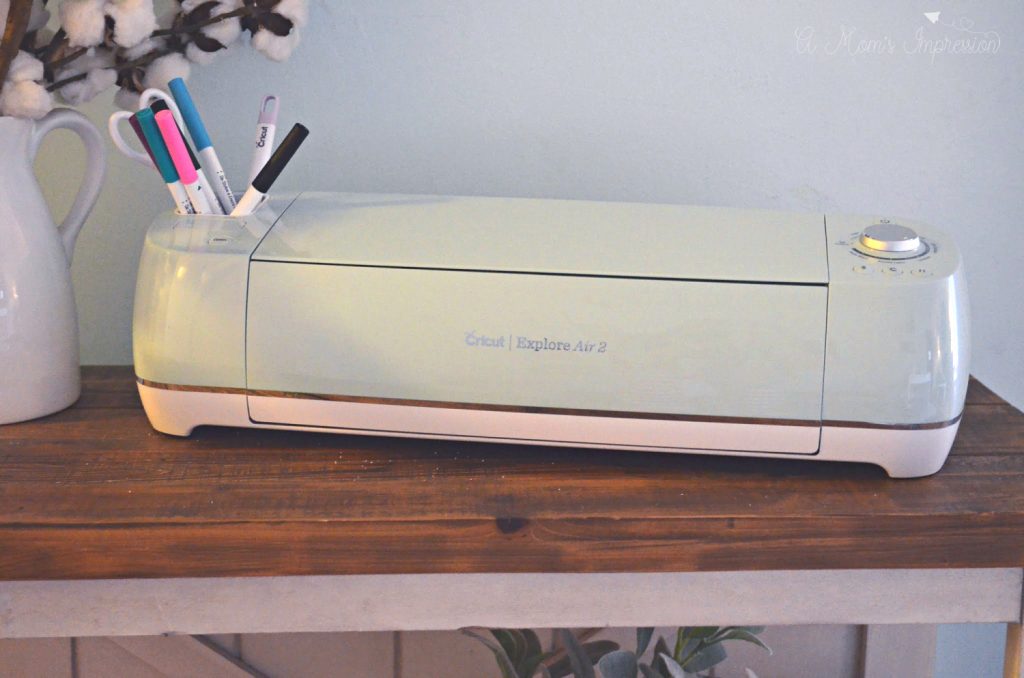
I have learned a lot about my Cricut cutting machine since it came home and I am excited today to tell you about 5 things that I love about my Cricut Explore Air 2 and also share a fun Ice Pop Koozie craft that your kids are going to love!
5 Reasons I love my Cricut Explore Air 2
1. The Tools! I did own a cutting machine a long time ago. I really didn’t use it that much because I could never get the blades to fit into it properly, thus it didn’t cut my materials all the way through. Cricut makes this so easy. My Explore Air 2 has two tool slots, one for a blade and one for a tool. I use this slot a lot for markers as well as the scoring tool for making cards! I never have to worry if the tools will work or fit properly! 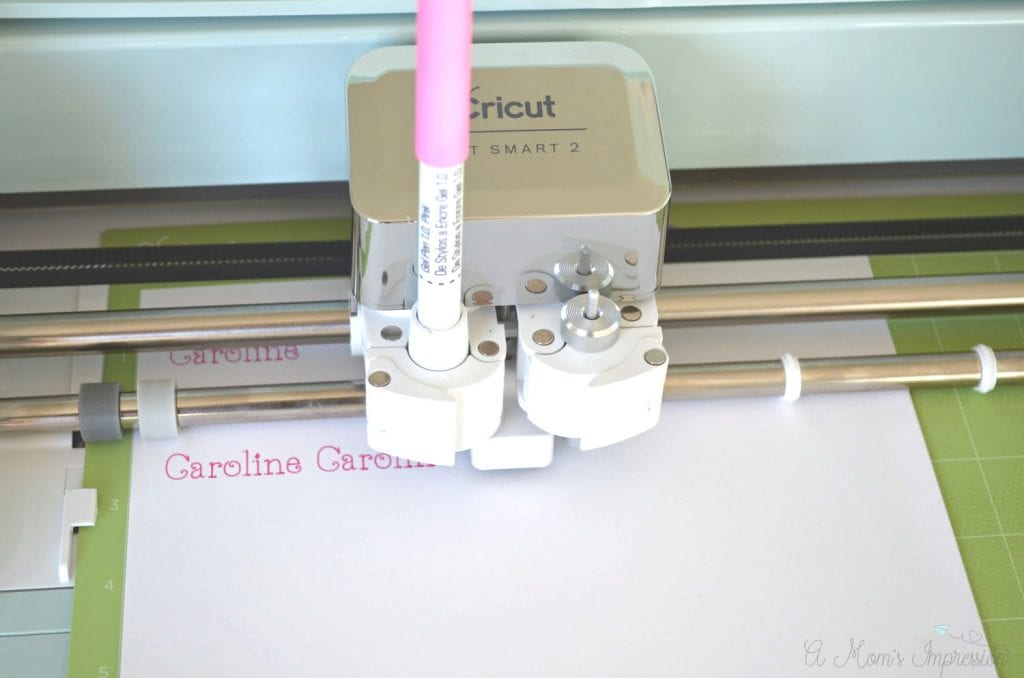
2. It’s User Friendly! Remember all the troubles I had with my old cutting machine? The Cricut Explore Air 2 is so easy and simple to use. It took minutes to set up and the software guides you through everything as you so its really easy to learn how to use it. There was no intimidation at all! I also love that there are so many design tutorials in Design Space that make finding new crafts to make super easy!
3. You can bring it with you! Do you and your friends get together to craft or are you a teacher and want to bring your cutting machine to school? If so, the Cricut Explore Air 2 is perfect for you! The machine is light and easy to carry with you. I have brought it to my classroom to cut out letters for a display and it was super easy to bring along and use with my laptop.
4. I can customize almost anything! I love a custom gift. My Cricut cutting machine allows me to customize just about anything and make it personal. My gift giving has gotten more personalized and special because I can make whatever size decal and use any name imaginable for my projects. You can even customize wall decals to make your home just a little more special than it already is!
5. All the Different Materials you can use! Cricut has a wide range of materials you can use your cutting machine with. So far my favorites have been the Infusible Ink and Glitter Iron on! These materials are well made and easy to use and make my crafts stand out in a crowd. For more information about how to use Infusible Ink be sure to check out our Cricut Infusible Ink Coasters with Mountain Quotes craft post! 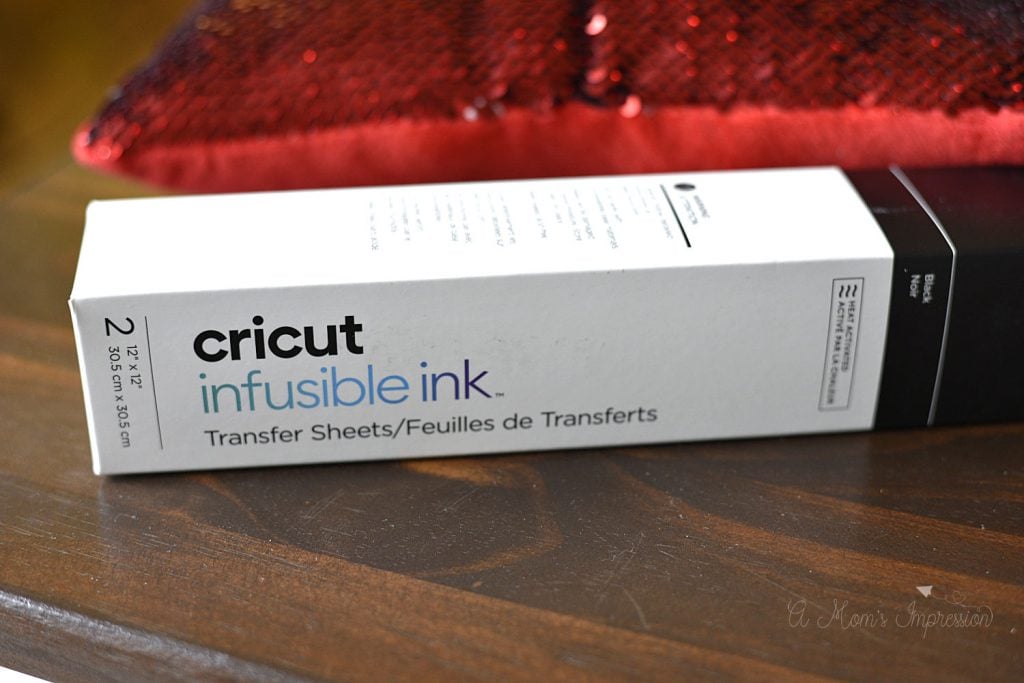
Speaking of Glitter Iron On… I have a fun craft project to share with you today!
What You Need to Make Frozen Pop Koozies
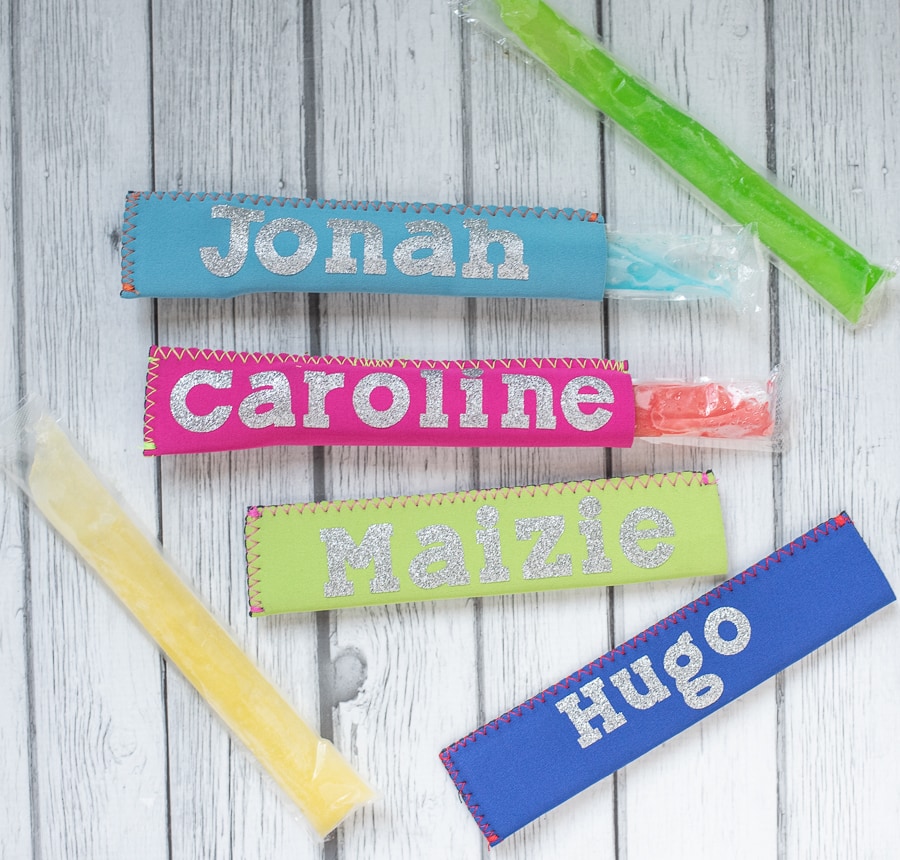
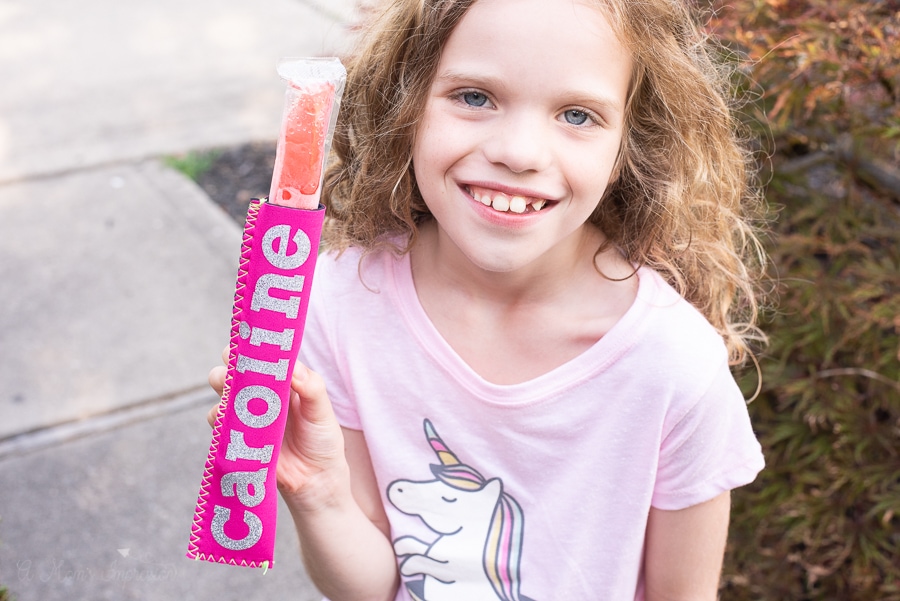
My kids love ice pops during the warm months. They also love those tubes of yogurt. These Ice Pop Koozies are perfect for both! They keep little hands from getting too cold while they enjoy their popsicles. Materials
- Cricut Explore Air 2
- EasyPress 2
- Cricut Glitter Iron On
- Weeding Tool
- Standard Grip Cutting Mat
- Blank Ice Pop Koozies
How to Make Custom Koozies for Ice Pops
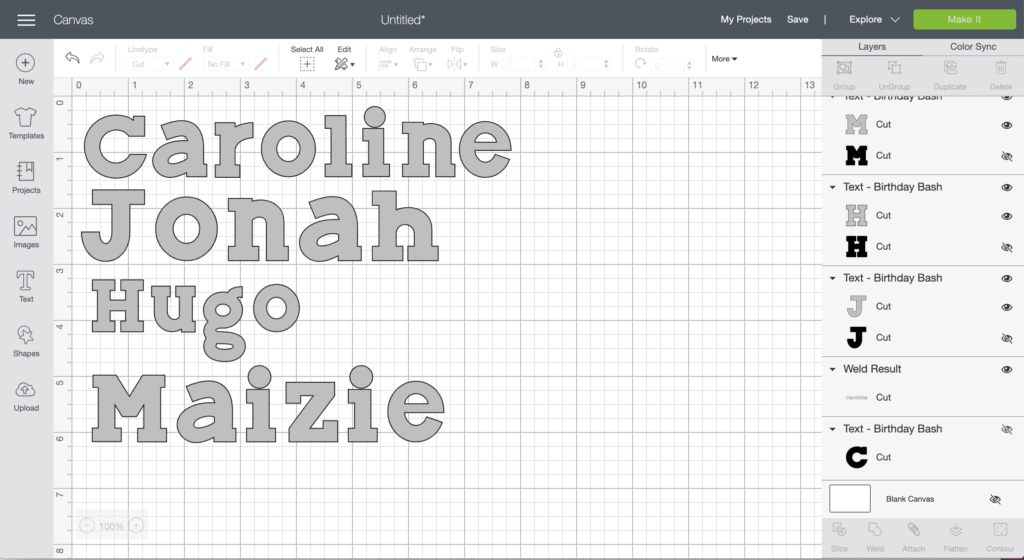
I simply used Cricut Design Space and put the names I wanted into the software. Next, I measured my koozies to figure out what size font I needed. For my kooizes I wanted the lettering about 1.5 inches high so I adjusted the font and size to fit. I found a fun font I liked and I made sure to weld my names together so they cut just like they appear in the software.
Click on Make It and then be sure to mirror the image! Don’t forget this step or your koozie design will be backwards. Select the custom dial on your Cricut cutting machine and in Design Space select Glitter Iron On as your material. The software will prompt you to mirror the image once you select the Cricut Glitter Iron On material.
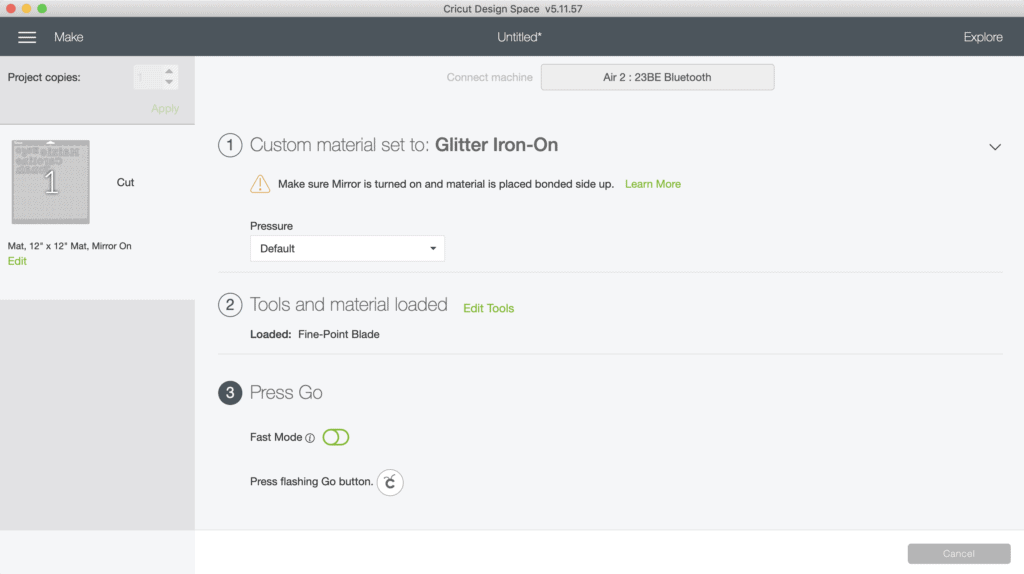
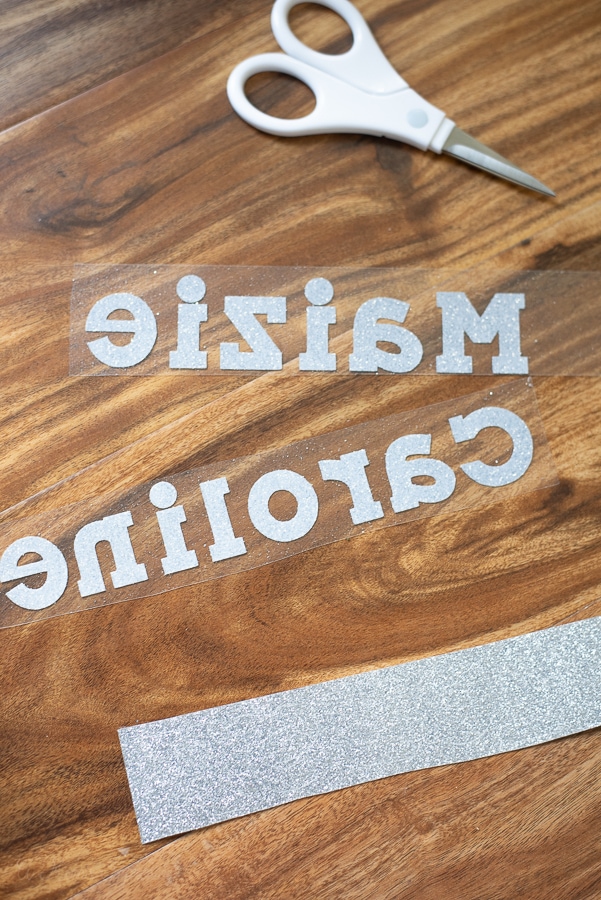
Load your Glitter Iron On onto your Green Standard Grip Cutting Mat. Follow the directions on Cricut Design Space after you set the material to Glitter Iron On. Load your mat and hit the Cricut button to begin your cuts. Cut away the access if you have any. When you are done, use your hands to weed out all the access vinyl you can. If there are small words, like mine, you might need to use a weeding tool. Next, I trimmed some of the access clear backing away from my design so that it was easier to work with when I went to place it on my ice pop koozie.
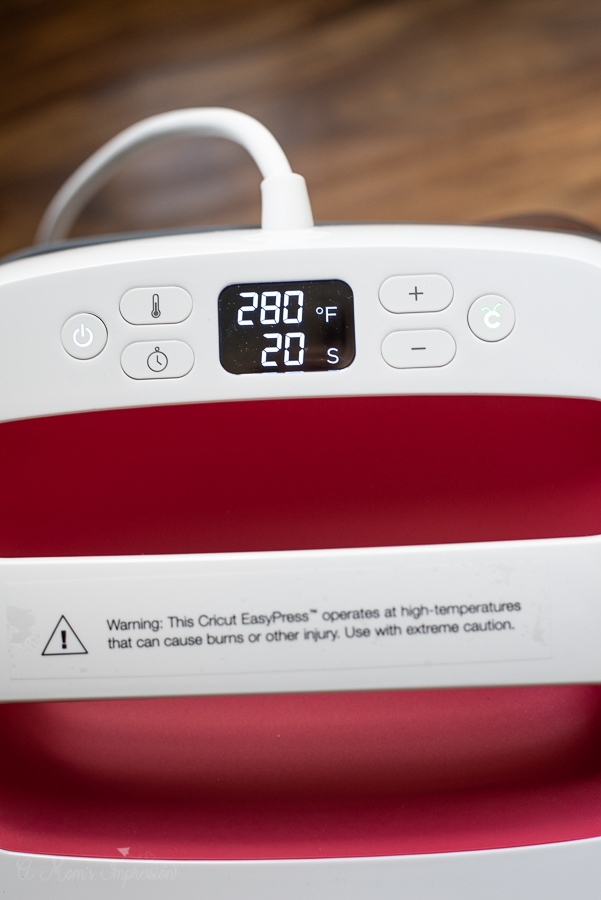
Plug in your EasyPress and set the temperature to 280. Set a timer for 20 seconds. I used the Cricut heat guide to find these settings using Glitter Iron-on and Neoprene. While your EasyPress is heating place the EasyPress mat down on your work surface.
When the EasyPress is heated up preheat your neoprene for 5 seconds. Next, position your name on top of your koozie, place the press right on top of the shiny liner and start your timer. Be sure to apply medium pressure for the entire 20 seconds. I was able to fit all four names under my EasyPress so I did them all at the same time. 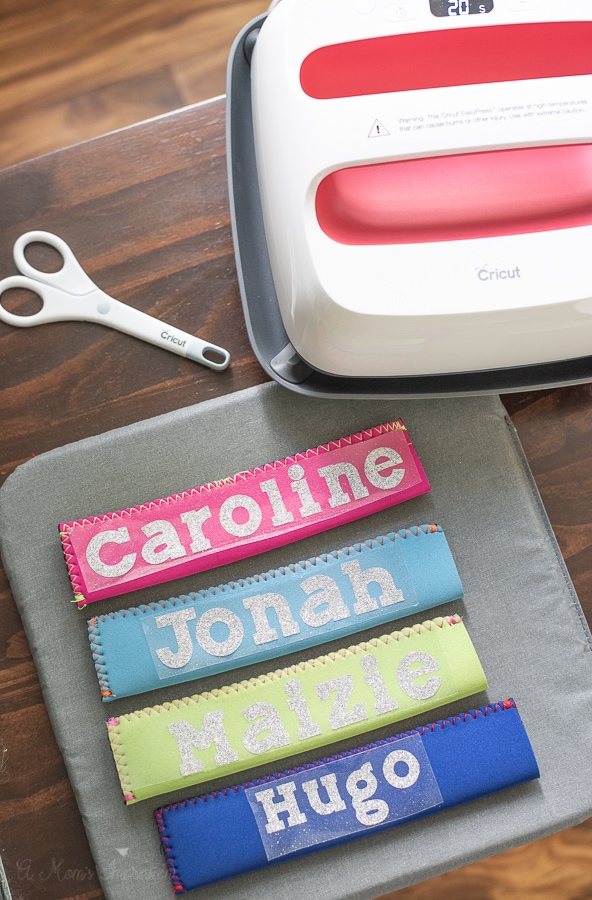
When the timer goes off, remove the EasyPress and allow the iron on to cool before touching it, this takes about 30 seconds. When the image is slightly warm, gently peel the backing off of the koozie. 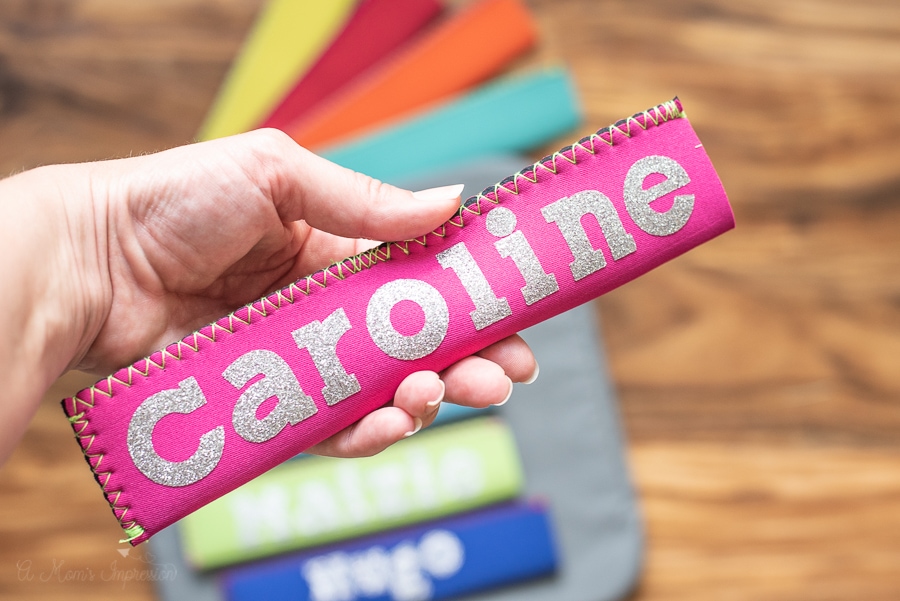
Add your frozen ice pop and enjoy! These make wonderful summer gifts for friends or if you are a teacher they are perfect as summer gifts for your students.
For more fun Cricut crafts be sure to check out: Custom School Masks Tutorial our Mini Farmhouse Rolling Pins or our American Girl Joss Inspired Girl and Doll Matching Outfits (Video Tutorial).