Fun and easy rock painting ideas for kids, these nail polish rocks not only look fun, they are super easy to make using supplies you probably already have at home. This step-by-step rock painting tutorial is fun for kids and adults alike!
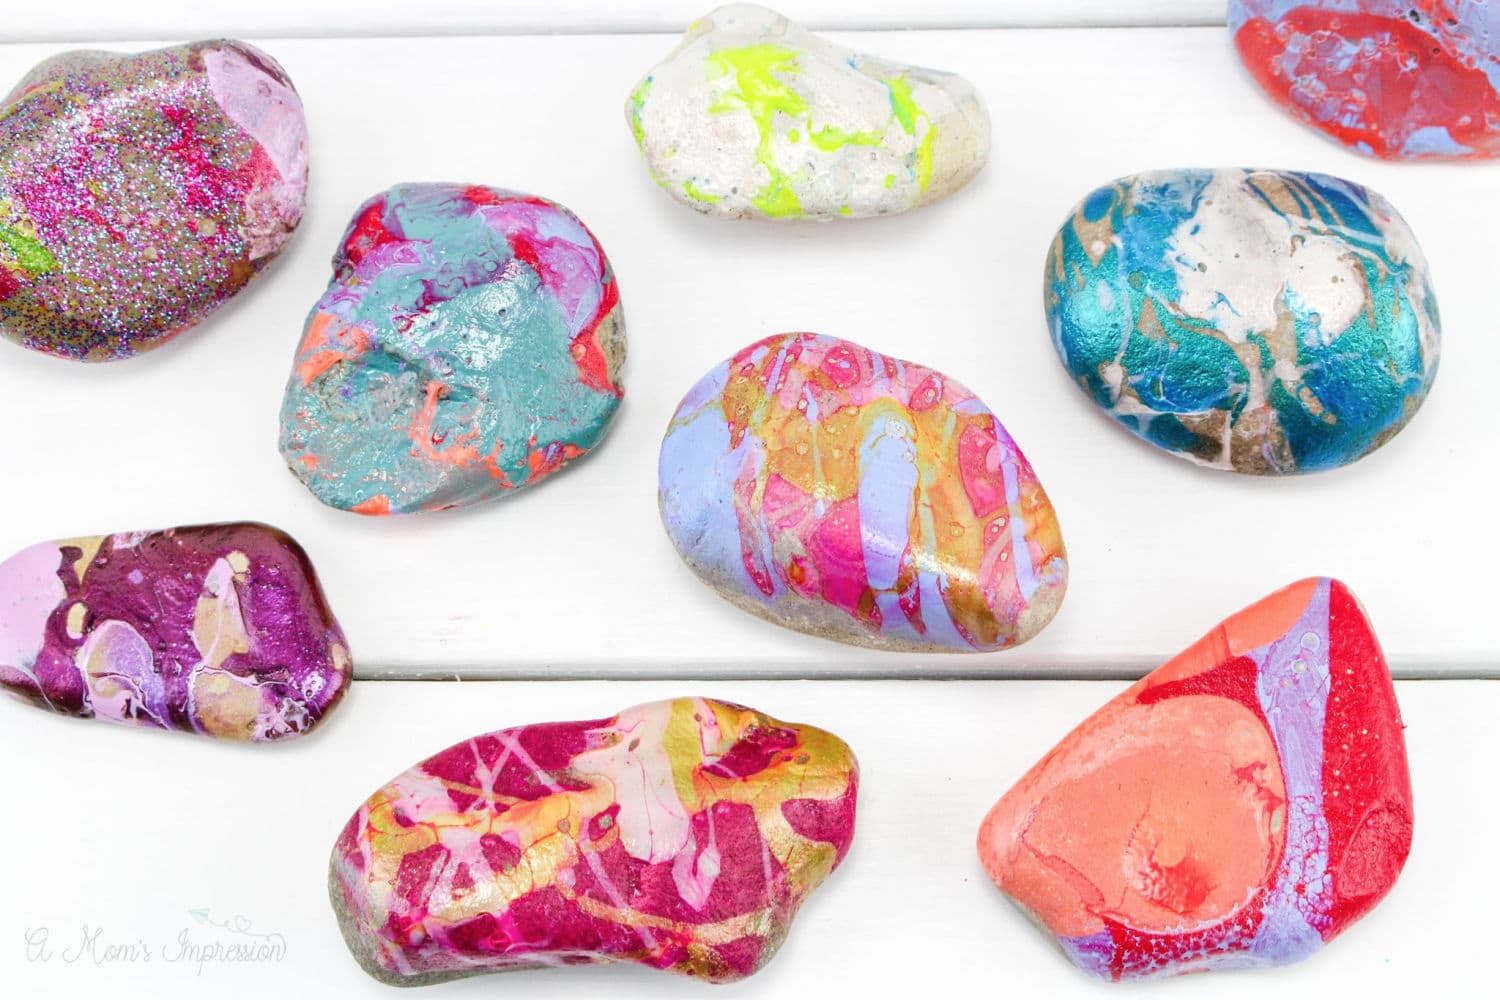
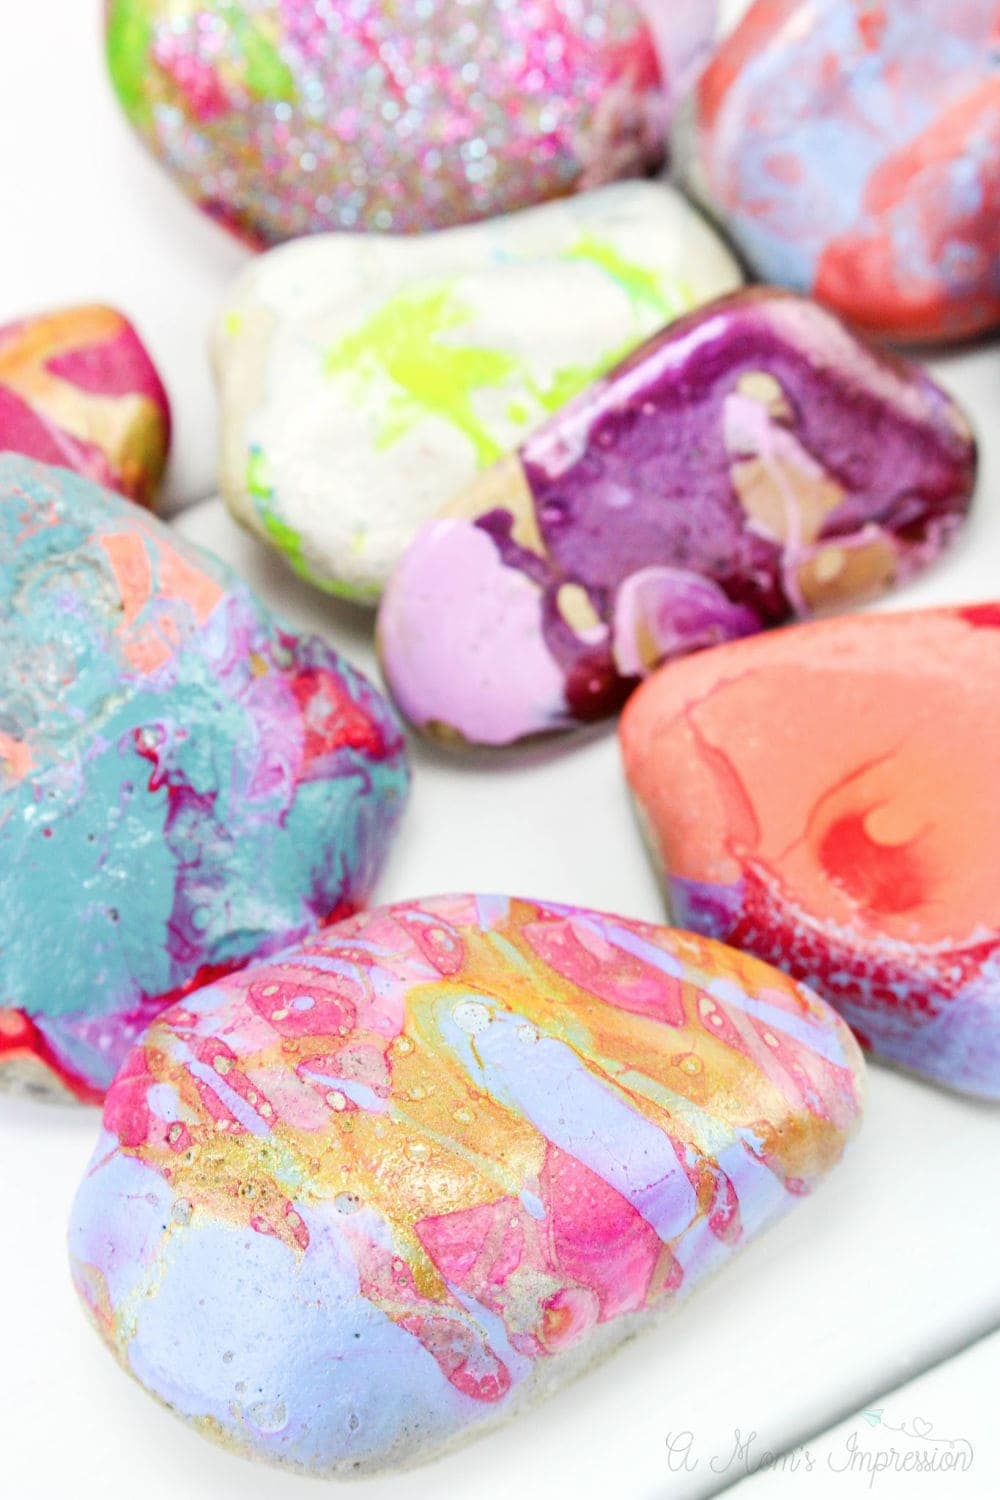
There is a fun trend going around where kids paint rocks and leave the for other kids to find. There are so many different ways to paint them. These nail polish painted marbled rocks are so beautiful! My kids love making them.
Easy Rock Painting Ideas for Kids
I say this is for kids but I gotta tell you, I loved making these myself! These fun painted rocks are so pretty and decorative. I like placing them in my potted plants for a little bit of color. The kids love hiding them around the neighborhood for other kids to find. It is a perfect family activity.
Right now we are spending a lot of time at home because of what is happening in the world. It can be a little confining at times so we make sure that we go out for walks around the neighborhood as often as we can. I love the idea of painting a hopeful word in the middle of these rocks and hiding them in plain sight for our neighbors to see. Maybe it could brighten up their day.
Another great thing about this activity is that you probably have everything you need at home already!
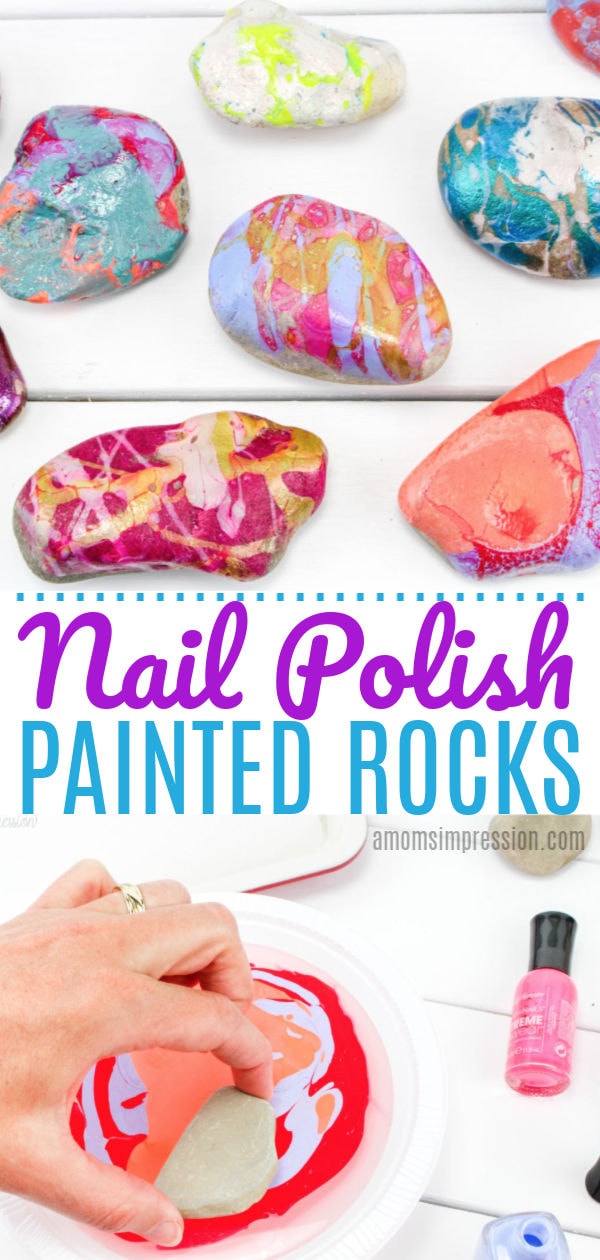
 Nail Polish Marbled Rocks
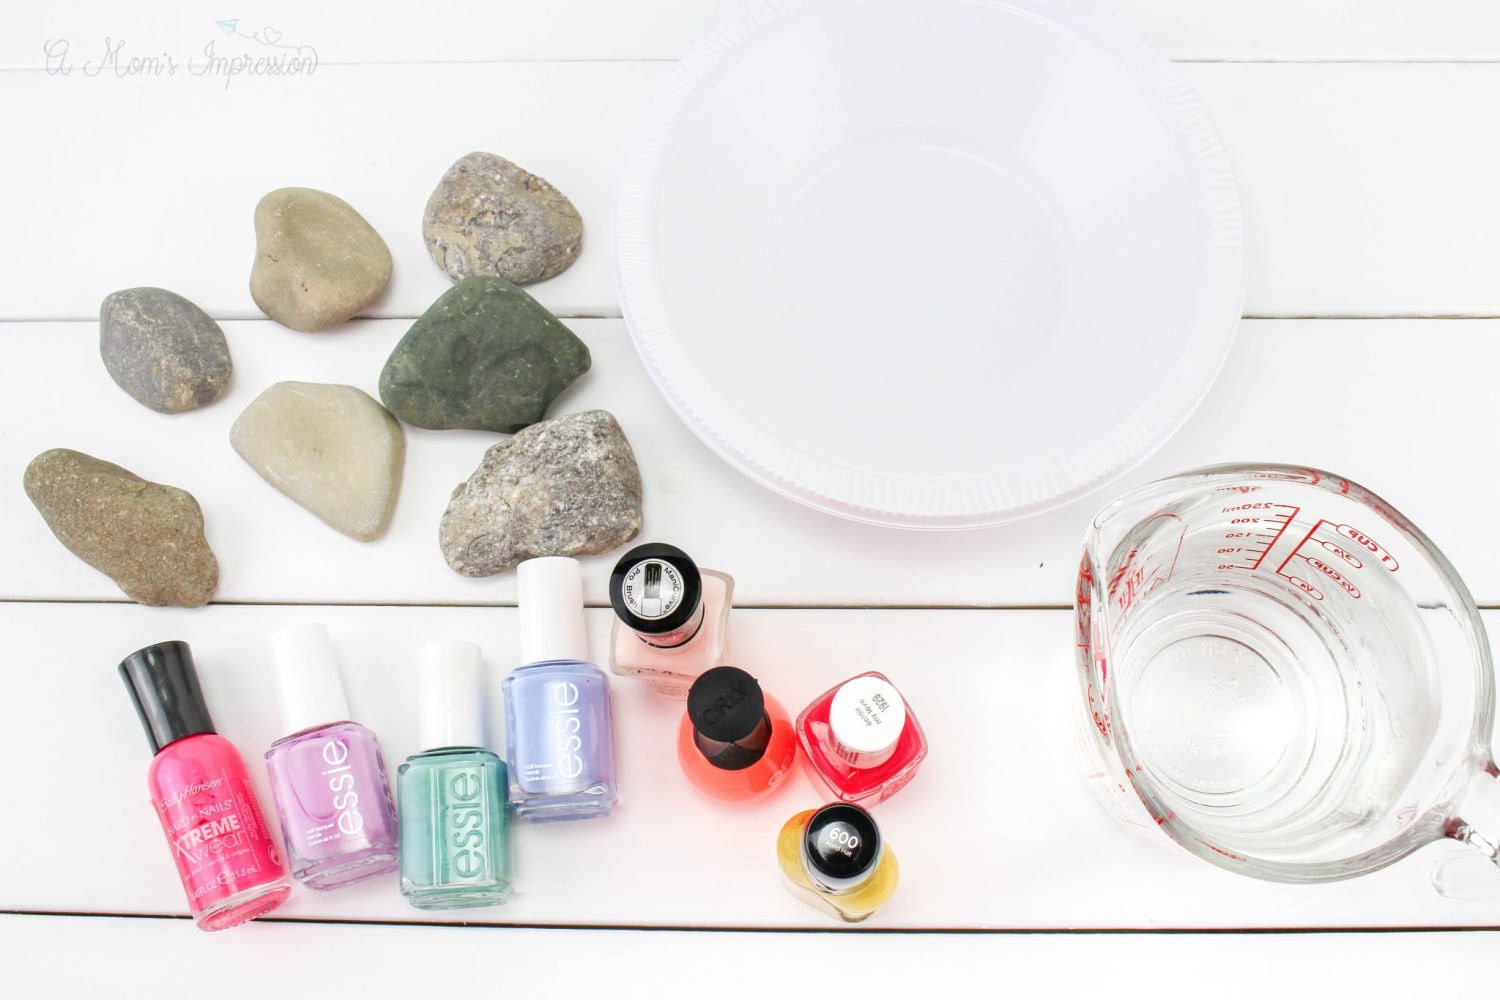
What’s Needed
- 7-8 Small Rocks (mine were 2”- 4” in size)
- 8-10 Bottles of Nail Polish—different colors
- 2 Disposable Bowls
- Water
- Toothpicks
- Disposable Gloves, optional
Directions
- Fill one disposable bowl about half full of lukewarm water. Mine was about 80-90 degrees. If the water is too warm the polish will sink to the bottom and not float.
- Choose 3-4 colors of polish and pour a little of each into the bowl, swirling them around as you pour.
- The colors will automatically swirl together in the water, so you don’t need to stir.
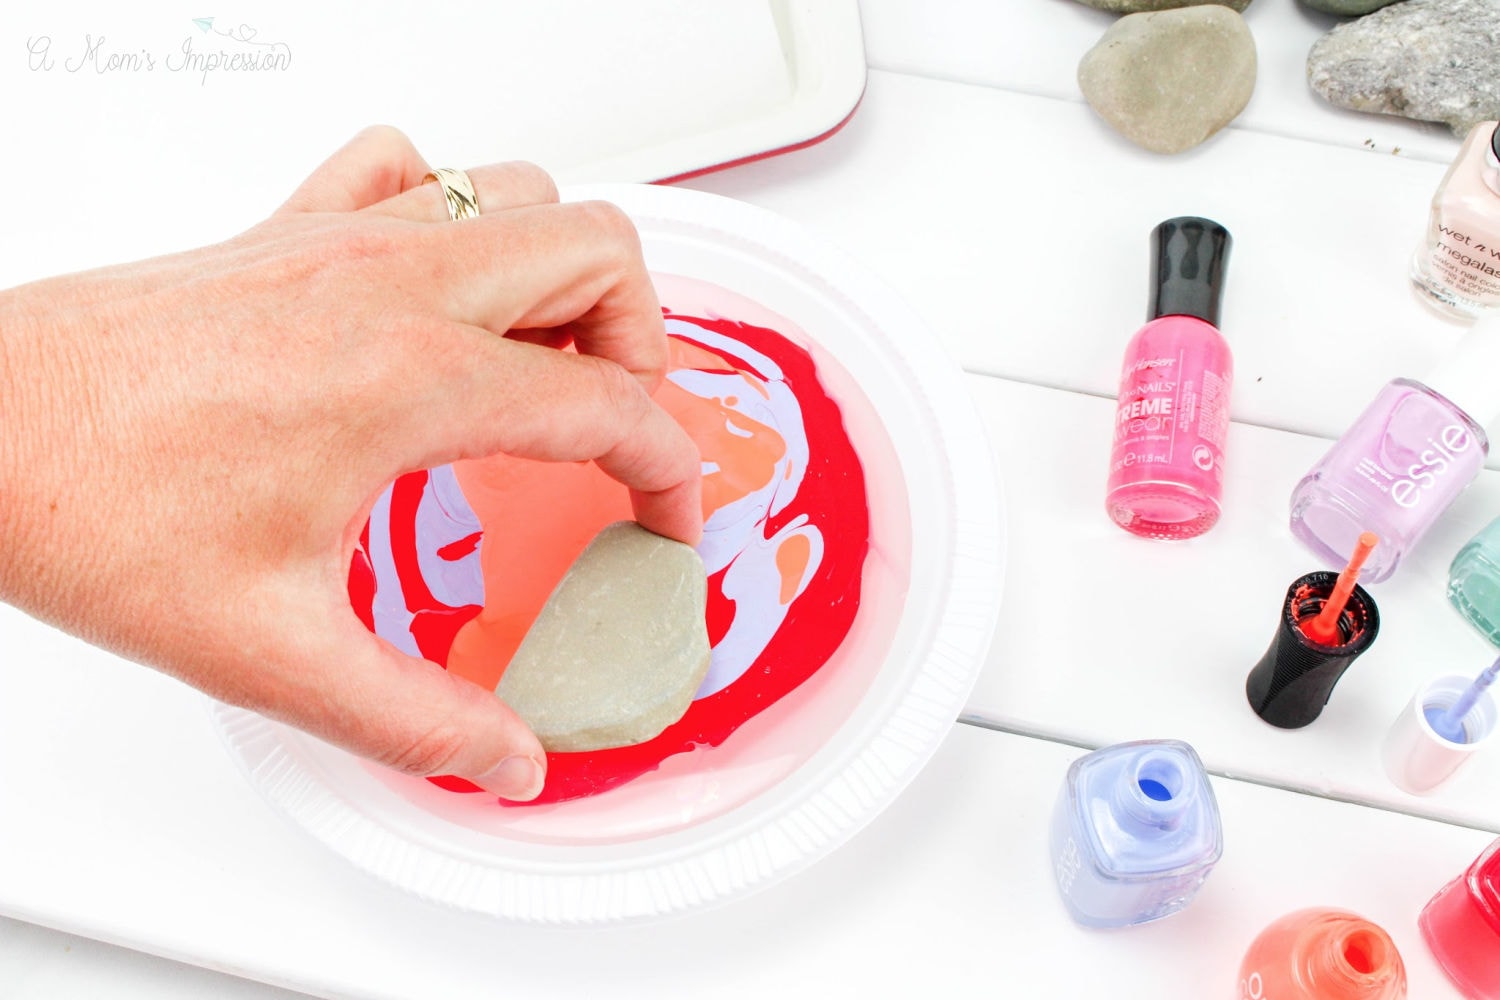
- Quickly dip a rock down into the water until the top half is covered in the colors. Pull it out, turn it over, and set it on paper towels or a paper plate.
- Repeat Steps 1-4 for the rest of the rocks using different combinations of colors. To reuse the same bowl of water, you can take a toothpick and drag it around the polish on top of the water, this will allow you to collect the polish and discard. Now you can add new nail polish colors to the same water. Only do this 2-3 times because you’ll need new water to keep the temperature accurate.
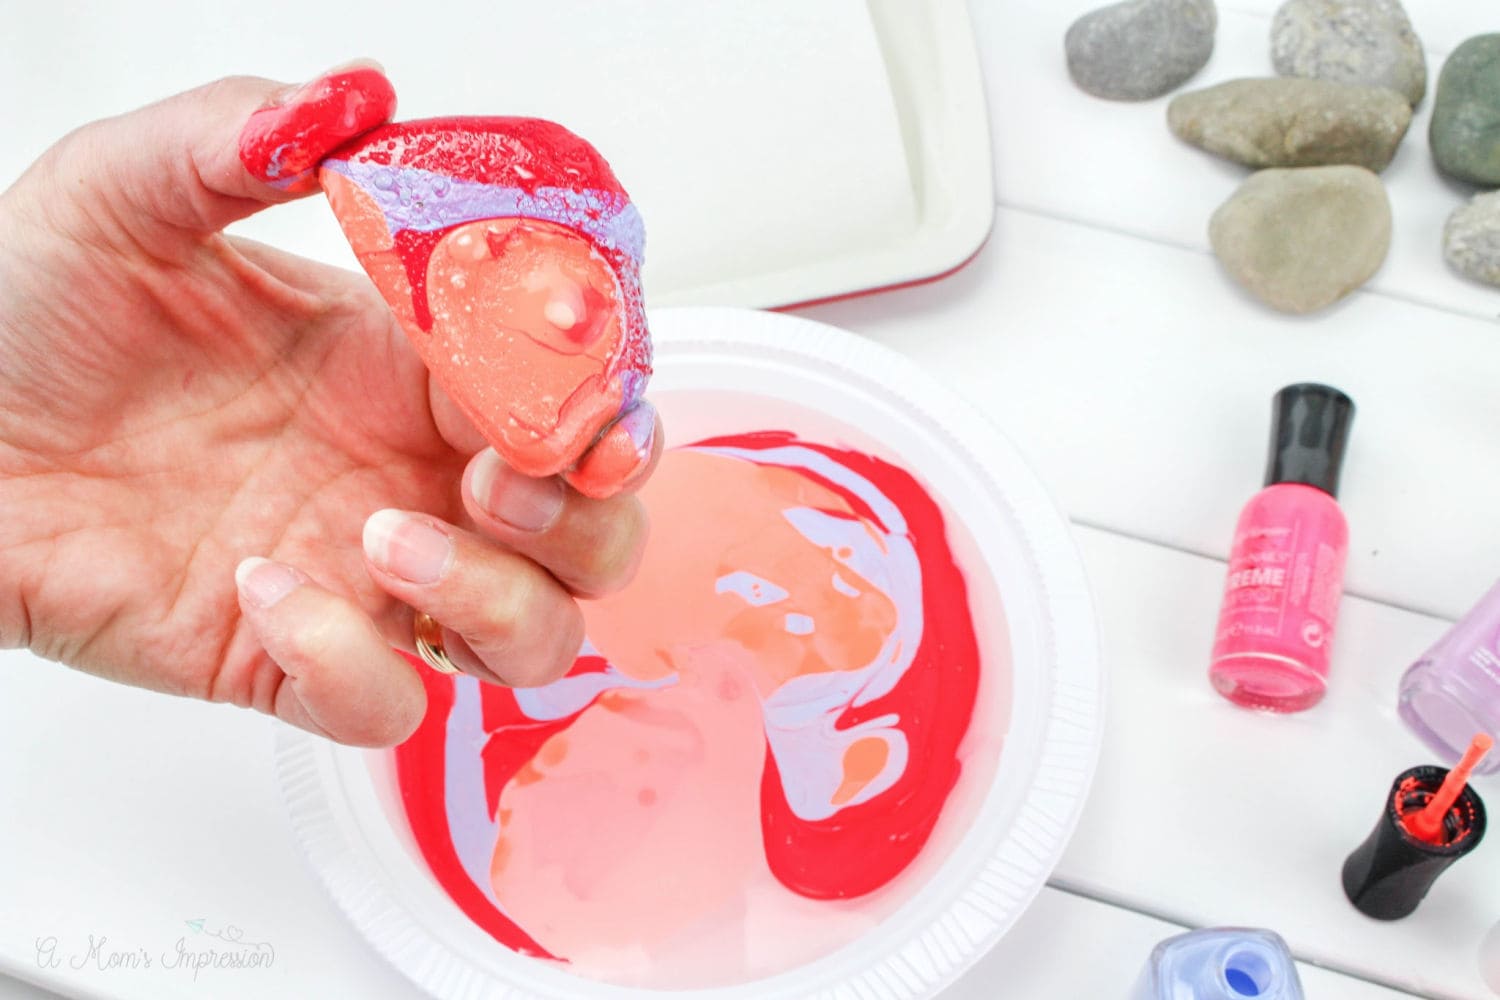
- You can use nail polish remover to get the polish off your fingers once you’re done dipping the rocks or wear disposable gloves.
- Let these dry for at least a couple of hours.
- Very fun indoor or summer craft for the kids!
*Note: do not dump the nail polish water down the drain. I dumped mine outside once I was finished. (I did skim most of the nail polish off with a toothpick first)
I hope you and your family enjoyed this activity. Please let us know if you tried it and share pictures of the final projects!
barb nana says
I’m more excited then I think my granddaughter will be after I’ve tried nail polish rocks I will send you a picture I’m just new at this and the same with my iPhone so I thank you so much for your instructions and I really look forward to doing the painted nail polish rocks Barb nana.
Lisa Freeman says
How do I seal these rocks so that the nail polish won’t get rubbed off ? That would make it so much better to do that project. Because I don’t want to do art projects for them to be all jacked up by the weather. Thank you
Mom says
I would spray a sealant over the top of them when you are finished.
Lisa says
Will gel nail polish work?